I’ve seen lots of posts recently about the Jar of Happiness and it’s such a wonderful idea: writing down all of the things that make you happy throughout the next 12 months and storing them in a jar. I decided yesterday that I was going to take part in the project, but I wanted to take it one step further. Instead of just using a bought jar, I wanted to decorate my own one. I love having an excuse to be creative, so today’s post is going to show you how to make Disney storage jars!
What will you need to make them?
A glass jar and it’s lid
Double-sided tape
Newspaper
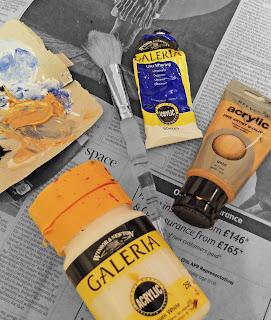
Acrylic paints
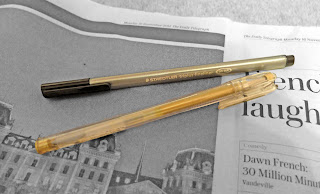
Gel pens
Fineliner pens
The example I made is a live action Cinderella one, so let’s get started!
The Preparation
The first thing you need to do is soak your glass jar and remove the labels. This usually takes 30 minutes to an hour. Once the jar is looking fresh and label-less, it’s time to cover it in tape!

You need to wrap the double-sized sticky tape around the jar, including the bottom. You also need to wrap the lid, but make sure it’s detached from the jar. The sticky tape is how we are going to attach the newspaper to the jar. Next, you guessed it – you need to rip the newspaper up and start sticking it to the tape. The jar needs to be completely covered in the paper, so you’ll need quite a bit of it. As soon as your jar is covered, you can start the fun bit: the decorating!
The Decorating
The first question you need to ask yourself in the decorating stage, is which Disney film or character do I want my jar to represent? I’d just watched the new Cinderella movie when I started making mine, so I chose to make mine Cinderella-style. You then need to decide which colour paints and pens you’ll need. Light blue and gold are the most used colours in Cinderella so I made sure I had my blue and gold acrylics to hand, with the addition of white, as it’s great for creating ombré effects!
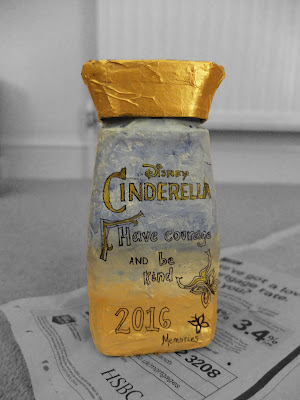
Using the paintbrush, start dabbing on the paint. Make sure it’s in it’s purest concentration and you’re not using water to paint on the jar. You need it as thick as possible so that it makes a deep layer over the newspaper. Make sure you try to blend your colours together when you’re painting; the white is really helpful with this! You’ll see below that I created a blue and gold ombré.
As soon as the ombré effect is complete, you need to paint the lid. I used gold for mine.
Now for the top layer of decoration!
This is where you need the fine liners and gel pens. I drew the Cinderella logo onto mine with my favourite quote from the film: ‘Have courage and be kind.’ My gold and black pens were so helpful at this point, as they gave the jar a really embellished look. Quotes are such a great and motivating addition to your jar. If you choose Beauty and the Beast, maybe you could write ‘Tale as old as time’ on yours, or ‘You’ve got a friend in me’ if you opt for Toy Story.
In addition to the quote I drew butterflies; Cinderella’s dress is decorated with butterflies in the film. I finished my jar off by writing ‘2016 Memories’ at the bottom. It’s going to be my 2016 ‘Jar of Happiness’ after all! I can assure you though, in true Cinderella style, I’ll definitely be adding moments of courage and kindness to the jar as well!
The Finished Product
Here is what my jar looked like in the end, and hopefully you’ll see that it has a real Cinderella feel to it. I’m thrilled with it, and it’s nice to think that my 2016 Jar of Happiness has a more personal touch.
I hope you’ve enjoyed the tutorial. Which Disney film would you choose to represent on a jar?
Thanks for reading my blog.
Love Mouse Chick ♡


Comments